
A Practical Setup Walkthrough for Your City-Bike
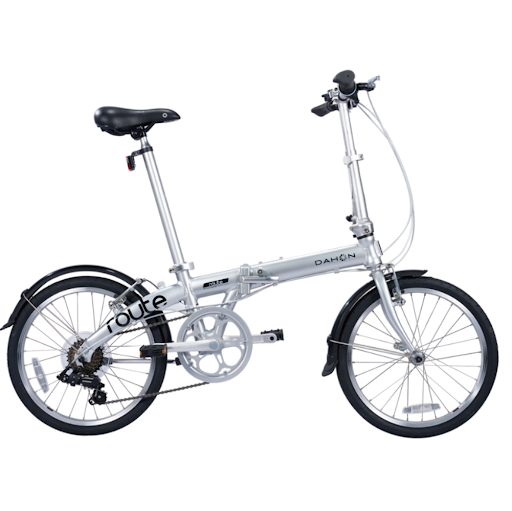
Getting a new bike ready for the daily grind of urban streets is more than just unpacking it and hitting the road. A well-prepared city ride can transform your commute from a chore into one of the most enjoyable parts of your day. Whether you are new to two-wheel commuting or upgrading from a heavier bicycle, taking the time to properly set up your ride pays dividends in comfort, safety, and reliability. This walkthrough breaks down the setup process into clear, manageable steps that any rider can follow, regardless of technical experience. From adjusting your saddle to fine-tuning your gears, each stage builds on the last to help you create a ride that feels tailored to your body and your streets. By the end, you will have the confidence to roll out onto busy avenues, quiet lanes, and everything in between.
Preparing Your Workspace and Tools
Before you even touch the bike, set aside a clean, well-lit area where you can work comfortably. A garage floor, balcony, or spare corner of a living room all work fine as long as you have enough room to walk around the frame. Lay down an old towel or piece of cardboard to catch drips of oil and keep small parts from rolling away. Good lighting matters more than most people realize, especially when you are checking alignment or looking for subtle wear on components.
Gather a basic tool kit before you begin. A multi-tool with hex keys ranging from three to eight millimeters covers most adjustments on a modern City-Bike, and a small adjustable wrench handles the occasional nut. Add a floor pump with a pressure gauge, a rag for cleaning, and a tube of chain lubricant, and you have almost everything needed for setup and ongoing maintenance. Keeping tools in a small box or drawer near your bike encourages routine care rather than emergency repairs.
Fitting the Bike to Your Body
A proper fit is the foundation of a comfortable ride. Start with the saddle height, since this single adjustment affects your knees, hips, and overall efficiency more than any other. Stand next to the bike and raise the saddle so it sits roughly level with your hip bone. Then sit on the saddle with the pedal at its lowest point and check that your leg has only a slight bend at the knee. If your hips rock side to side as you pedal, the saddle sits too high. If your knees feel cramped, it sits too low.
Next, look at the saddle angle. A level saddle suits most riders, though small tilts up or down can relieve pressure for certain body types. Handlebar height comes next, and here the rule of thumb depends on your riding style. Commuters who want an upright, traffic-friendly posture benefit from bars set slightly higher than the saddle. Riders who cover longer distances or want a sportier feel may prefer bars at or just below saddle height. Adjust the reach by loosening the stem and rotating the bars until your wrists rest naturally without strain.
Checking Wheels, Tires, and Brakes
With your fit dialed in, turn your attention to the wheels. Spin each one and watch for wobbles or side-to-side movement. A slight wobble can often be corrected by tightening loose spokes, but a large warp usually calls for a visit to a bike shop. While the wheel spins, listen for scraping sounds that could indicate brake pads rubbing against the rim or disc rotor. Squeezing the brake lever should produce firm resistance well before the lever touches the handlebar.
Tire pressure is one of the most overlooked adjustments on any urban bike. Check the sidewall of your tire for the recommended pressure range, then use your floor pump to fill each tire to a value near the middle of that range. Softer tires roll more comfortably over rough pavement but risk pinch flats, while harder tires roll faster but transmit more vibration. Adjust based on your weight, the road conditions you face, and personal preference. A quick check before every few rides keeps your tires performing consistently.
Dialing In the Drivetrain
Smooth gear changes make city riding far more pleasant, especially on routes with stoplights and short hills. Lift the rear wheel and shift through every gear while turning the pedals by hand. Each shift should happen quickly and quietly, with no chain rubbing against the derailleur cage after the change completes. If shifts feel sluggish or noisy, small turns of the barrel adjuster on the shifter or derailleur usually solve the problem. Turn it a quarter turn at a time and retest between adjustments.
Chain care matters more than many new riders expect. A dry, gritty chain wears quickly and drags down every part of the drivetrain. Wipe the chain with a rag before applying lubricant, then drip a small amount onto each link while turning the pedals backward. Let the lube settle for a minute, then wipe off the excess to keep grime from sticking. This simple routine every couple of weeks extends the life of your chain and cassette dramatically.
Setting Up Lights, Reflectors, and Accessories
Urban riding often involves early mornings, evening returns, and unexpected weather, so visibility gear deserves as much thought as any performance component. Mount a bright front light where it points at the road a short distance ahead of your wheel, not upward into oncoming eyes. Add a rear light that can operate in steady mode for group traffic and flashing mode for open roads. Many riders keep both lights charged and clipped to the bike at all times, which turns a forgotten evening ride into a non-issue.
Accessories like fenders, a rack, and a bell round out a practical urban setup. Fenders keep water and street grime off your clothes when the weather turns, while a rear rack transforms your bike into a versatile carrier for groceries, work bags, or weekend loads. A bell is small but essential in areas with mixed pedestrian traffic. Choose accessories that match your daily needs rather than loading the bike with extras that add weight without purpose. Brands like DAHON have built reputations around thoughtful urban and folding bikes because they understand how these small additions define real-world usability.
Test Ride and Fine-Tuning
Every setup benefits from a genuine test ride, ideally on a route that includes different surfaces, a few turns, and at least one hill. Pay attention to how your body feels in the first ten minutes, when small discomforts become easy to notice. Numb hands often signal that bars sit too low or too far away. A sore lower back can point to a saddle set too far forward. Take mental notes rather than trying to fix everything on the ride itself.
After the test ride, return to your workspace and make small adjustments based on what you noticed. Change one thing at a time, then ride again to see how it feels. This iterative approach beats making multiple changes at once, since a single tweak might be all you need to transform the ride. Over the first few weeks, expect to revisit these adjustments as your body settles into the new position and your components bed in with use.
Building a Simple Maintenance Rhythm
A great initial setup means little if the bike falls out of tune within a month. Build a simple habit of visual checks before each ride and light maintenance every couple of weeks. Look at your tires for embedded glass or cuts, squeeze your brake levers to confirm firm engagement, and lift each wheel to spin it for any new noises. These quick checks take under a minute and catch small issues before they become breakdowns on the way to work.
Set a monthly reminder for deeper care. Clean the chain and drivetrain, check bolt torque on the stem and seatpost, and inspect brake pads for wear. Once or twice a year, take the bike to a shop for a professional tune-up that covers items harder to check at home, like bearing condition and cable stretch. Riders who commit to this rhythm find their bikes stay reliable for years with only occasional part replacements. Companies such as DAHON design components with easy servicing in mind, which makes ongoing care approachable even for beginners.
Riding Out With Confidence
A thoughtful setup process turns any urban bicycle into a reliable partner for daily life. By working through fit, wheels, drivetrain, and accessories in a clear order, you build a machine that feels like an extension of yourself rather than a piece of equipment you tolerate. Small adjustments made now save hours of frustration later, and simple maintenance habits keep the ride smooth for years. The reward is a bike that responds to your instincts on crowded streets, absorbs the small chaos of city traffic, and encourages you to choose two wheels for more of your trips. Take your time, trust the process, and enjoy the quiet satisfaction of a ride that fits you perfectly. The city looks better from the saddle of a well-tuned bike, and every commute becomes a chance to appreciate that view.