How to Apply a Laptop Skin Without Bubbles
Applying a laptop skin full body is one of the easiest ways to protect your laptop while giving it a stylish, personalized look. However, many people worry about air bubbles, wrinkles, or misaligned edges during installation. The good news is that with the right preparation and technique, you can apply a laptop skin smoothly and achieve a professional-looking finish.
In this guide, you’ll learn the step-by-step process to apply a laptop skin full body without bubbles and keep your laptop looking brand new.
Why Proper Installation Matters
A correctly applied laptop skin offers several benefits:
-
Smooth, bubble-free appearance
-
Better protection against scratches
-
Longer-lasting adhesive performance
-
Professional finish
-
Easier cleaning and maintenance
Taking a few extra minutes during installation can make a significant difference in the final result.
Things You’ll Need
Before starting, gather the following items:
-
Laptop skin full body
-
Microfiber cloth
-
Screen-safe cleaning solution or isopropyl alcohol
-
Dust-free workspace
-
Plastic card or squeegee
-
Soft cloth for smoothing
Having everything ready before you begin makes the installation process much easier.
Step 1: Clean Your Laptop Thoroughly
The most common cause of bubbles is dust trapped beneath the skin.
Before applying the skin:
-
Turn off your laptop.
-
Remove any existing stickers.
-
Clean the surface using a microfiber cloth.
-
Remove fingerprints, dust, and grease.
-
Allow the surface to dry completely.
A clean surface helps the adhesive stick properly.
Step 2: Identify Each Skin Piece
If you’re installing a laptop skin full body, you’ll usually receive separate pieces for:
-
Top lid
-
Bottom panel
-
Palm rest
-
Trackpad (if included)
Lay out each piece and confirm its position before removing the backing paper.
Step 3: Align Before Peeling
Don’t remove the entire backing immediately.
Instead:
-
Place the skin over the laptop first.
-
Check the alignment around the logo, edges, ports, and hinges.
-
Make sure all cutouts line up correctly.
This simple step prevents mistakes during installation.
Step 4: Peel Slowly
Start by peeling back only a small section of the backing paper.
Apply the exposed portion first while keeping the remaining backing attached.
Working in small sections provides better control and minimizes air bubbles.
Step 5: Apply from the Center Outward
This is the most effective technique for preventing bubbles.
Using a plastic card or squeegee:
-
Press gently from the center.
-
Push trapped air toward the edges.
-
Continue slowly as you remove more backing paper.
Avoid pressing too hard, as excessive force may stretch the vinyl.
Step 6: Remove Small Air Bubbles
If you notice a small bubble:
-
Lift the nearby section carefully.
-
Reapply while smoothing outward.
-
Use the squeegee to guide trapped air toward the edge.
Tiny bubbles often disappear naturally after a day or two as the adhesive settles.
Step 7: Install the Palm Rest and Bottom Skin
After completing the top cover, continue with the remaining sections.
Take your time when installing:
-
Palm rest skin
-
Bottom panel skin
-
Trackpad skin
Accurate alignment creates a seamless full-body appearance.
Step 8: Press the Edges Firmly
Once all pieces are applied:
-
Press around the corners.
-
Smooth the edges.
-
Check every cutout.
-
Ensure there are no loose sections.
This helps prevent peeling during daily use.
Step 9: Let the Adhesive Set
Avoid heavy handling immediately after installation.
For the best results:
-
Leave the laptop unused for several hours.
-
Avoid excessive heat during the first day.
-
Allow the adhesive to bond completely.
This improves durability and long-term performance.
Common Mistakes to Avoid
Many installation issues are caused by simple mistakes.
Avoid:
-
Applying the skin on a dusty surface
-
Removing all backing paper at once
-
Rushing the installation
-
Pulling or stretching the vinyl
-
Ignoring alignment before sticking
-
Pressing unevenly
Patience leads to a much cleaner finish.
Tips for Long-Lasting Results
To keep your laptop skin full body looking its best:
-
Clean it regularly with a soft microfiber cloth.
-
Avoid harsh chemical cleaners.
-
Keep sharp objects away from the surface.
-
Store your laptop in a protective sleeve while traveling.
-
Don’t pick at the edges of the skin.
With proper care, a quality laptop skin can maintain its appearance for a long time.
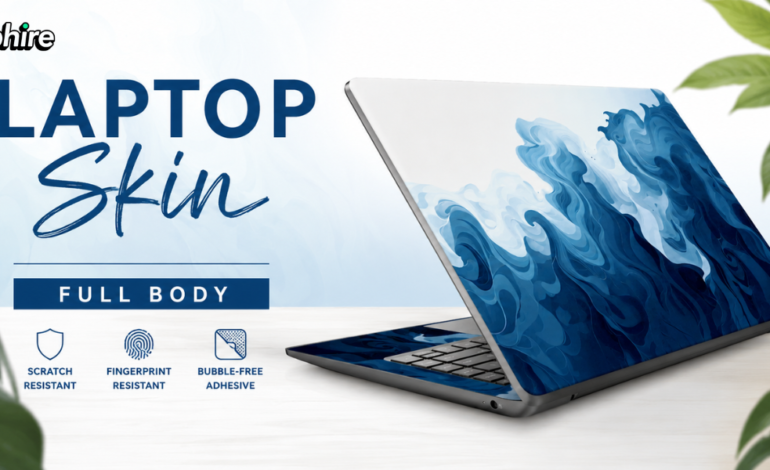
Why Choose Sirphire Laptop Skins?
A great installation starts with a high-quality product. Sirphire offers premium laptop skin full body options made from durable vinyl with precision-cut designs for a perfect fit. The skins feature bubble-free adhesive for easier application, vibrant fade-resistant prints, and residue-free removal, making them suitable for students, professionals, gamers, and creators alike.
Whether you prefer a minimalist style or a bold custom design, Sirphire helps you protect and personalize your laptop with confidence.
Final Thoughts
Installing a laptop skin full body without bubbles is easier than it looks when you follow the right steps. By cleaning your laptop, aligning the skin carefully, applying it gradually, and smoothing from the center outward, you can achieve a neat, professional finish.
Choosing a premium skin from Sirphire also makes the process simpler thanks to precision-cut designs and high-quality adhesive. With the right installation and care, your laptop will stay protected while showcasing a style that’s uniquely yours.